CHOCOLATE CHIP COOKIES

When I was a youngster, every once in a while (definitely not enough), mom would make her way into the kitchen and make her version of chocolate chip cookies. I write “version” because, as it is, there are around a gazillion ways to make them.

For example:

Use melted butter
Don’t use melted butter
Use browned butter
Add some cornstarch
Use more baking powder
Chill the dough (dreaded)
Don’t chill the dough

And everyone seems to have an opinion on their favourite type of cookie: 

Crunchy
Soft
Crunchy and soft
Flat
Thick
Big
Small

Well . . . you get the idea. 

Mom’s chocolate chip cookie recipe (sadly long lost) yielded cookies that were flat-ish (not a bad thing), pale-ish in colour (also not a bad thing) and full of Hershey’s Chipits Semi-Sweet Chocolate Chips (definitely a very good thing). If there were any left over (and that is a BIG if) they froze exceptionally well (as most cookies do) to satiate a late night (or early morning) sweet tooth craving. 

I remember hovering around the countertop as she made them. Wide eyes gazing attentively to her every move and mouth watering for a taste of the cookie dough. She let me help, of course, and wildly enough, most of the dough ended up on the cookie sheet, but inevitably we both ate some with sticky fingers, flour on our shirts, butter on the countertop and always with big smiles and lots of laughs. 

Looking back, those times with mom in the kitchen seemed simple and beautiful. Now, they are memories, I hope, that will last a lifetime. And, of course, the older I get, the more precious these memories become. I think a lot of you know what I mean. 

Now onto my version of chocolate chip cookies. 

I won’t call this the “perfect chocolate chip cookie recipe ever” mainly because I don’t think any recipe is perfect. And chocolate chip cookie recipes are definitely not one size fits all. 

But . . . I promise if you follow the recipe, your cookies will be excellent. And maybe, just maybe, you’ll be making this recipe with your children by your side or your furry family members scurrying around your feet trying their best to help too! 

This recipe is simple, but if you are new to baking, there are some fundamentals that are great to learn before trying any cookie recipe. Until a few months ago, to be honest, I didn’t consider myself much of a baker (other than bread . . . I bake really good bread). But then I found Baker Bettie and her free online “Baking Fundamentals” course and I learned so much! This isn’t a plug for Bettie. I just wanted to let you know there are some golden nuggets in there. 

Here’s the link: https://bakerbettie.teachable.com/p/fundamentals-of-baking 

A few key fundamentals for this recipe that will result in a mouth watering batch every time: 

  1. Cream your butter and sugar for a full five minutes.
  2. Know your oven temperature (I have an inexpensive oven thermometer hanging in my oven all the time. Our oven runs cool by around 5 to 10 degrees which can impact your baking a lot.
  3. Use room temperature eggs. (In fact, room temperature is key for most ingredients unless stated otherwise in the recipe.) 
  4. Let the cookies rest on the baking tray for 5 minutes before transferring to a wire rack to cool. 
  5. Ideally, weigh your ingredients when baking. Digital scales cost around $10 to $20 and are a great investment if you are jumping into baking. 

Now maybe the best thing about this cookie recipe is you do NOT have to chill the dough. And that means, you can zoom straight to Captain Cookie Champion in under one hour. 

So thanks to my mom for letting me be her baking sidekick and, of course, for always letting me lick the bowl.  

Note: If for any reason you are struggling with this recipe, message me anytime at trevor@gluggable.com and I will personally help. I really want you to have an incredible chocolate chip cookie recipe at your fingertips!

Dry Ingredients
540g all purpose flour (4 ½ cups)
1 teaspoon baking powder
1 teaspoon baking soda
1 teaspoon salt

Wet Ingredients 
345g softened butter (3 sticks) 
1 ¼ cups granulated sugar
1 ¼ cups brown sugar (lightly packed) 
2 large eggs, room temperature 
1 tablespoon vanilla 

2 cups semisweet chocolate chips (plus extra ½ cup for tops of cookies before baking) 

  1. Preheat oven to 375°F and line two baking trays with parchment paper. 
  2. Sift together flour, baking powder, baking soda and salt into a medium bowl and set aside.
  3. Using a stand mixer with the paddle attachment (or a hand mixer), cream together softened butter, white sugar and brown sugar for five minutes. (It is important to cream for a full five minutes. Please do not skip this step.)
  4. Add 2 large eggs and vanilla to wet ingredients and beat until creamy (15 to 20 seconds). 
  5. By hand, stir dry ingredients into wet ingredients until just combined using a solid wooden spoon. 
  6. Fold in 2 cups of semisweet chocolate chips into the mixture until just combined. 
  7. On one parchment lined tray at a time, drop ¼ cup ice cream scoop (or two tablespoons) of dough and add an additional 4 to 6 chocolate chips on top of each unbaked cookie.
  8. Bake for 12 minutes on middle rack in oven (one tray at a time).
  9. Remove cookies from the oven and let rest on the tray for five minutes. 
  10. Transfer cookies to a wire rack to cool. 

Recipe created by Gluggable.

MAPLE SUGAR

Oh Canada! We love your natural beauty, your nanaimo bars, poutine and butter tarts. But perhaps what we love most about you (in the culinary sense) is your maple syrup. It is 100% derived from nature and “healthier” than refined white sugar (except when you eat it in large quantities like we sometimes do). It’s melt-in-your-mouth delicious and sugar-sweet, certainly, but with that unmistakable maple flavour. Use it as you would regular sugar 1:1 in recipes to give an earthy, woodsy depth (like our maple caramel budino) – or like us, enjoy some of it stirred into coffee or right from the spoon whenever you have a late-night sugar craving.

NOTE: While this recipe calls for the use of a stand mixer, you can use a wooden spoon instead by mixing the hot maple syrup vigorously in a large bowl. Moderate strength required if you go this route. 

Makes 2 cups 

2 cups maple syrup, preferably light or amber

  1. Bring your stand mixer near to the stove (you’ll be transferring boiling hot liquid syrup to it, so make sure it’s safely nearby) and fit it with the whisk attachment
  2. In a large fairly high-sided saucepan, pour in the maple syrup and heat it over medium-high heat. The syrup will begin to bubble and rise as it increases in temperature, but do not stir unless it gets dangerously close to bubbling over the sides. Continue to heat until a candy thermometer ready 257°F to 262°F (this will take approximately 20 minutes)
  3. Being extremely careful, but also acting fairly quickly, remove from heat and pour the hot syrup into the bowl of a stand mixer and start to beat immediately.
  4. The syrup will begin to crystallize quickly as it cools and form into granules of maple sugar.
  5. Sift maple sugar and store in mason jar or other airtight container

TREVOR’S CINNAMON ROLLS

According to a recent (and very scientific) Instagram poll, 97.5% of respondents prefer to enjoy their cinnamon rolls with icing – and lots of it. (OK, maybe not super scientific, but we did conduct a poll, and those were the actual results). If life has taught us anything, it’s that the secret to making a cinnamon roll that everyone will love is to slather it with so much icing no one can complain there’s not enough. This recipe is fun, forgiving and always makes people smile. And that makes the Gluggable Team very happy!

Makes 12 rolls

For the dough
1 cup milk
2 ¼ teaspoons instant dry yeast
2 large eggs, room temperature and lightly beaten
⅓ cup unsalted butter
1 teaspoon salt
½ cup granulated sugar
4 ½ cups all-purpose flour

For the filling
1 cup packed brown sugar
2 tablespoons cinnamon
½ teaspoon salt
½ cup unsalted butter, melted
¾ cup 35% heavy cream (or half-and-half), room temperature

For the frosting
1-250 gram package of cream cheese, must be at room temperature
2 ½ cups icing sugar
⅓ cup unsalted butter, softened (see note below)
¼ teaspoon salt
2 teaspoons vanilla extract

  1. Warm the milk to 100°F-115°F and then pour into a large bowl with the yeast, eggs, butter, salt and sugar. Stir to combine, allowing the butter to melt into the other ingredients. Let rest for two minutes. Stir in the flour (you may have to use your hands here) until a dough forms, then tip it out and knead the dough for 8-10 minutes until it’s smooth and soft. Form into a ball, place in an oiled bowl, cover with plastic wrap (or plastic bag) and leave it to double in size, about 30-60 minutes. In the meantime, you get on with the filling.
  2. In a small bowl, mix the brown sugar, cinnamon and salt and set aside.
  3. Once the dough has risen, roll it out to a rough rectangle about 12” x 26” and brush with the melted butter. Evenly sprinkle the cinnamon-sugar mixture over the buttered dough and gently press in. Beginning at the long side of your dough rectangle, tightly roll the dough and gently seal the edge by pinching the seam together. Cut the roll into 12 even rounds.
  4. Line a 9” x 13” metal baking pan with parchment paper and place the rounds, swirly cut-side up, in three rows of four (don’t worry about a snug fit, as they will puff and swell as they prove). Let rolls rise for an additional 20 to 30 minutes until puffed up until roughly 1.5 times their original size. While they rise again, preheat the oven to 375°F.
  5. Pour the 35% cream (or half-and-half) over the rolls and then put in the hot oven to bake for 25 to 35 minutes (check after 25 minutes) and are a rich golden brown (rolls are cooked when internal temperature reads 190°F). Remove rolls from the oven and set them aside to cool while you prepare the frosting
  6. To make the frosting: In a large bowl using an electric mixer, beat together cream cheese, icing sugar, butter, salt and vanilla. Then, generously slather frosting on top of cooled cinnamon rolls and enjoy

Professional Frosting Note (a ProFroNo, if you will): You can use softened (not liquid) brown butter here, as recommended by Claire Saffitz for an ultra-rich frosting. Make the brown butter and refrigerate until it solidifies, yet is still soft.

CHOCOLATE CAKE

Chocolate Cake Recipe from Gluggable

When we set about on this Gluggable (…don’t say journey…don’t say journey) adventure and sat down to write our favourite recipes, I (Simon) was of two minds when it came to this one. I thought: “Does the internet need another chocolate cake recipe?” – but also, “There’s a reason why I’m holding a slice of chocolate cake in our first photo shoot.” Indeed, it’s not just any chocolate cake; it is my maternal grandmother’s chocolate cake – and if this journey (dammit!) was about sharing recipes we love to make people happy, then there was no question: This one takes the cake.

I’ve fiddled a bit with Gran’s original recipe, and I might do her Yorkshire “prudence” a disservice in suggesting full-on icing coverage (“A dusting of icing sugar is fine, pet”) – but it’s deeply satisfying either way. For a gluten-free version, you could substitute the flour with 220 grams of ground almonds.

FOR THE CAKE

250 grams all-purpose flour (or 220 grams ground almonds)
1 ¼ cup sugar
1 teaspoon baking powder
½ teaspoon baking soda
½ cup cocoa
2 sticks unsalted butter, softened
2 extra-large eggs
1 tablespoon vanilla extract
1 cup full-fat Greek yogurt

FOR THE ICING

1 stick unsalted butter
200 grams dark chocolate (min. 70% cocoa), roughly chopped
3 cups icing sugar, sieved
1 tablespoon corn syrup
½ cup 35% cream

  1. Place all ingredients on your work surface and, while they come up to room temperature, preheat the oven to 350°F
  2. Butter and flour – or otherwise line two 8” (20cm) cake tins
  3. Combine all cake ingredients in a food processor and blitz until smooth. Gran, however, would just mix the flour, sugar, baking powder and baking soda in a large bowl, then beat in the softened butter. In a separate bowl, whisk together the cocoa, yogurt, vanilla, and eggs. Tip this into the thick mixture and beat until smooth.
  4. Evenly divide the batter into the prepared tins and bake for 35 minutes (until a cake tester or skewer comes out clean) – though take a peek after 30. It’s not a bad idea to switcheroo your cake tin positions midway through.
  5. Set the cakes (in their tins) on a wire rack to cool for 15 minutes before turning out.
  6. To make this icing, melt the butter and chocolate together in a heat-proof bowl over a pan of simmering water. Don’t let the bowl touch the simmering water – nor let any drips splash into the chocolate and butter as you don’t want the chocolate to seize.
  7. Remove the bowl from the pan and let it cool a little before pouring in the corn syrup, followed by the cream and vanilla. A note: You might need to add a few drops of boiling water or add some additional icing sugar, depending on icing consistency. It should be smooth enough to spread easily yet still hold in place and not drip.
  8. To build the cake, slab some (about a third) of the icing onto the centre of one cake half. Spread the icing evenly to the edge, then carefully set the other cake half on top. Resist the temptation to squish together – but a gentle smoosh is good.9. Here’s where Gran would wrap things up with a final dusting of icing sugar (and us, grandkids would share the leftover icing!) – but to continue icing, spoon half the remaining icing on top. Smooth evenly and then spread the sides of the cake with the remaining icing. Leave to set for a few minutes, then dive in!

FROZEN ORANGE MOUSSE

The 1980s were full of retro=chic amazing recipes. This is one of them. It uses simple ingredients paired with fun and approachable cooking techniques that yield a sense of accomplishment

Continue reading

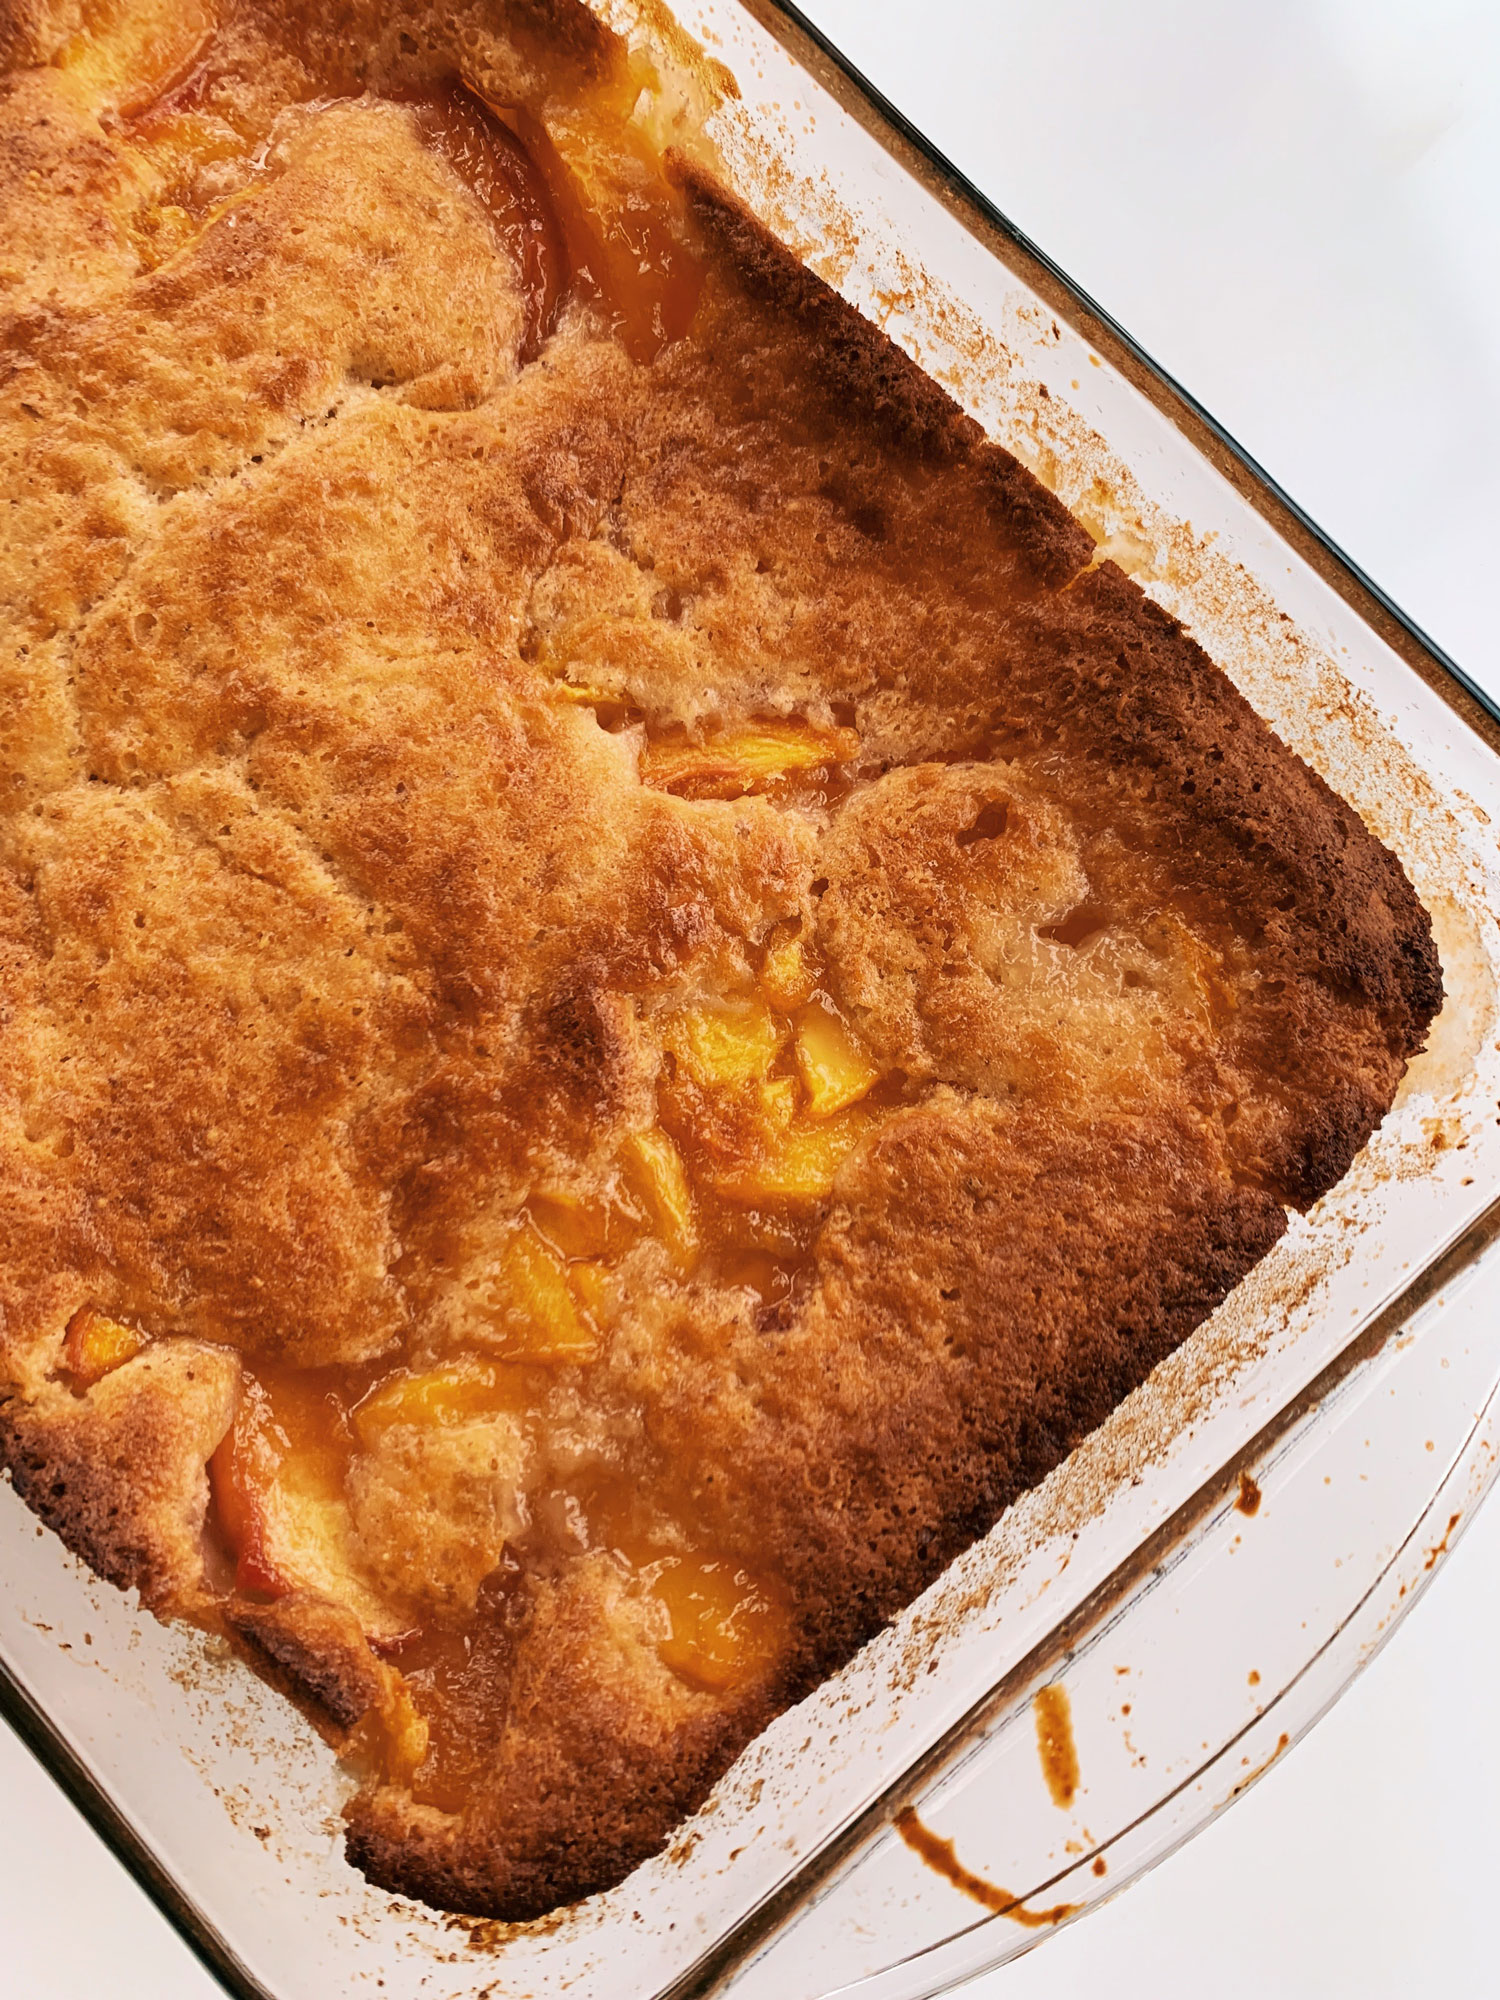
PEACH COBBLER

Without question, this is one of the simplest recipes we’ve come across. For peach lovers, this is truly one of the happiest and most enjoyable desserts you can make.

Continue reading